How to Create a Portable Classroom
Authored By:

Question: What’s the easiest way to travel while teaching? The answer: teaching online! Teaching online is a great way to work and travel. Because you’re working virtually, your classroom and students go where you go! You could traverse the entire Eurasian continent and be able to work at the same time! However, travelling with a classroom can be difficult. A lot of online EFL company requires teachers have some sort of background to create a classroom. These companies don’t provide it for you, so most online teachers will create their own. This could be a whiteboard that you have decorated behind you with maps or pictures, a few stuffed animals, or something else. For travelling teachers, it can be a bit of a challenge to have a background, especially when you’re on the go. You don’t want something too bulky, but it also has to be durable and needs to create that classroom vibe whether you’re island hopping in Greece, channeling your inner Viking in Norway, or visiting the elephant sanctuaries in Laos. The solution is to have a portable classroom!
I, myself, have a portable classroom. I’m not currently travelling, but I do it often enough that having a transportable classroom was a necessity. But how, exactly do you get one? Well, I can guarantee that you’ll probably not find one on Amazon. Your best bet will be to make your own. But wait! Not very craft-oriented? Not to worry! Neither am I. This craft is actually pretty simple.
Making your classroom
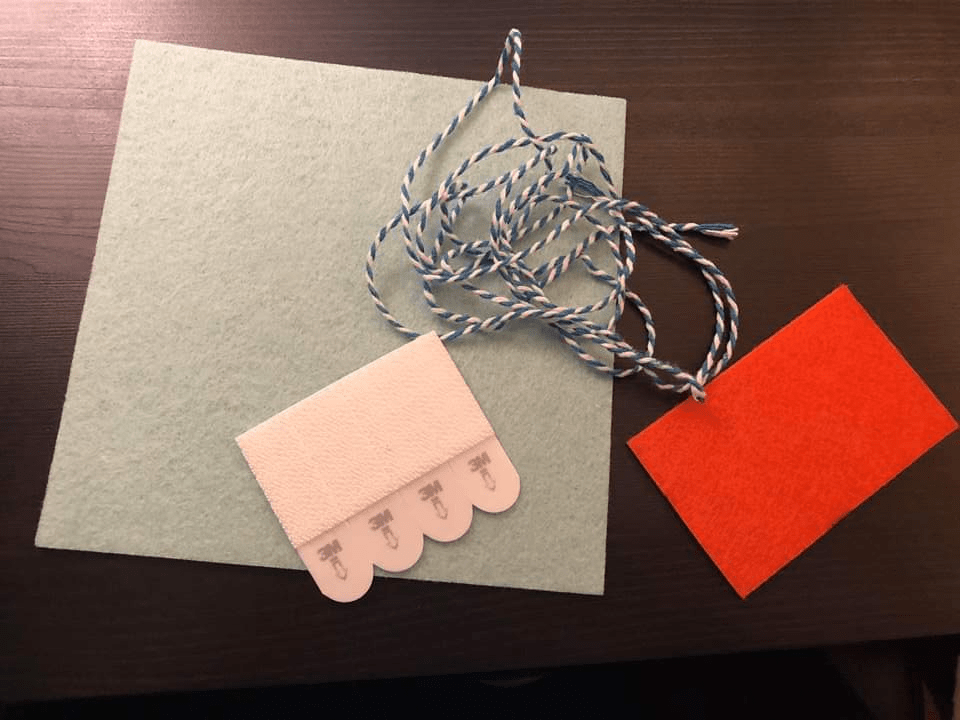
- Get some felt, ribbon, felt squares, and Velcro strips from the store. These are your four materials that’ll become your classroom. Having a good pair of scissors is always a good idea, and you’ll probably need them for this. Also, a hot glue gun comes in very handy. For the felt, I recommend at least 2 × 3 feet. Your web cam will most likely see it all. However, if you want to be very sure about what size, run a video test (I just used Skype) and use a tape measure to double check just how much your webcam captures. Make sure to pick a plain color that isn’t too distracting. For the ribbon, pick something you like! Make sure that it’s 9 feet long (at the very minimum). For the felt squares, you can find those at almost any craft store. You can replace these with felt letters (either 3 or 4 inches) too. For the Velcro stirps, I just used Command Brand because they’re very easy to set up, and the removal isn’t damaging and is fairly quick.
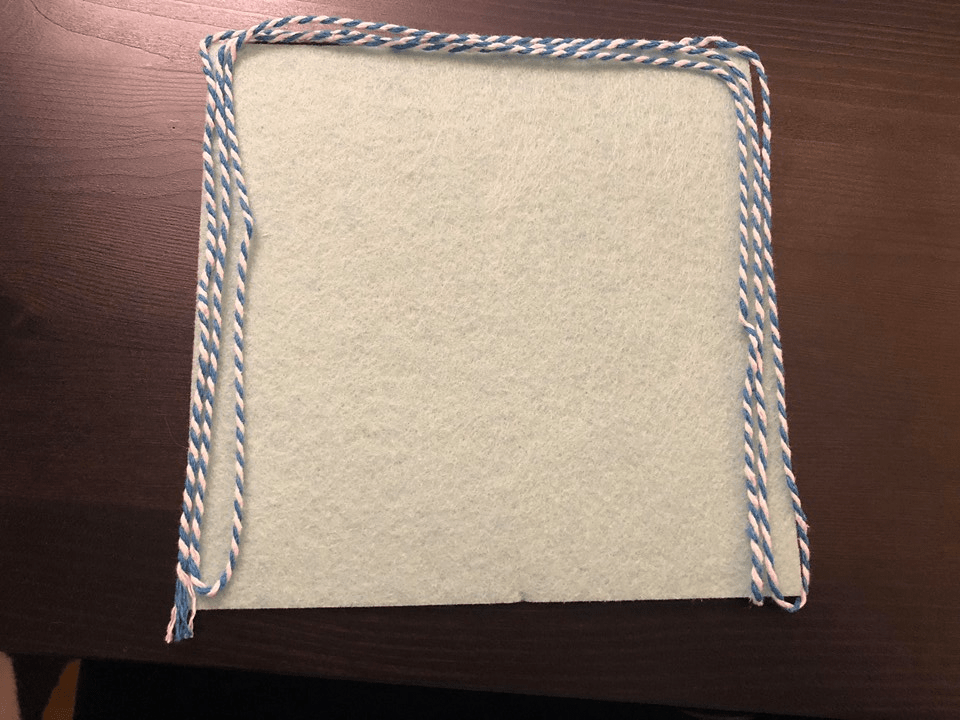
- Glue ribbon on the felt background. The ribbon is a boarder around your large piece of felt. Lay it out on the felt before doing anything to make sure that you’re happy with how it looks. Glue it down using a hot glue gun. PRO TIP: Hold the ribbon in place with paper clips! You can glue in between the paper clips and remove them once the glue has dried.
-
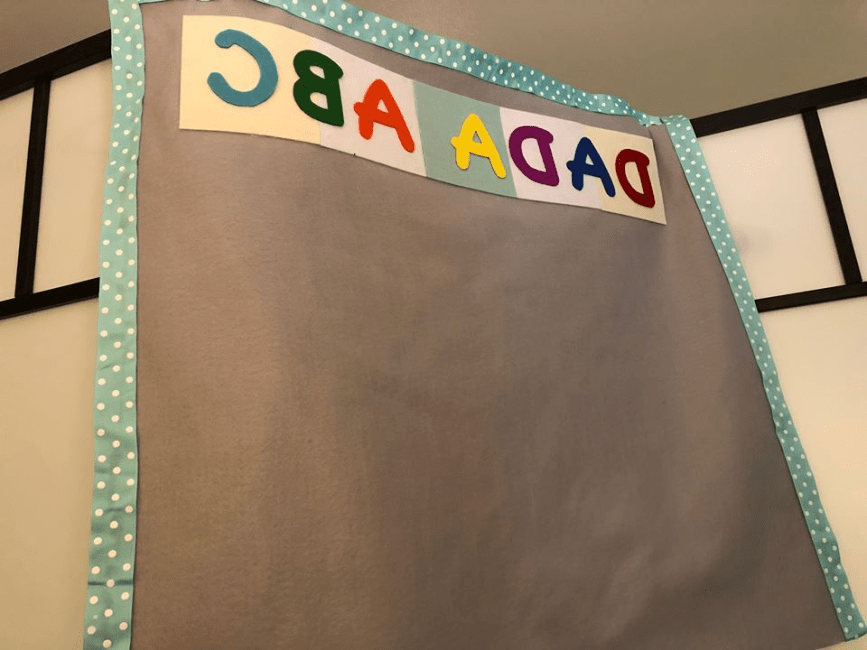
Glue on letters. Before you do ANYTHING, do a video test. Write on a piece of paper what you want on your classroom background. Hold it up to your webcam and see if it looks correct in the reflection. If it looks backwards, then write the words backwards and verify that it looks correct. Then, cut letters from the felt squares and place them on the background. Again, place the letters and check to make sure you’re happy with it before gluing them down. Once you’re done and are okay with how it looks, glue them down.

-
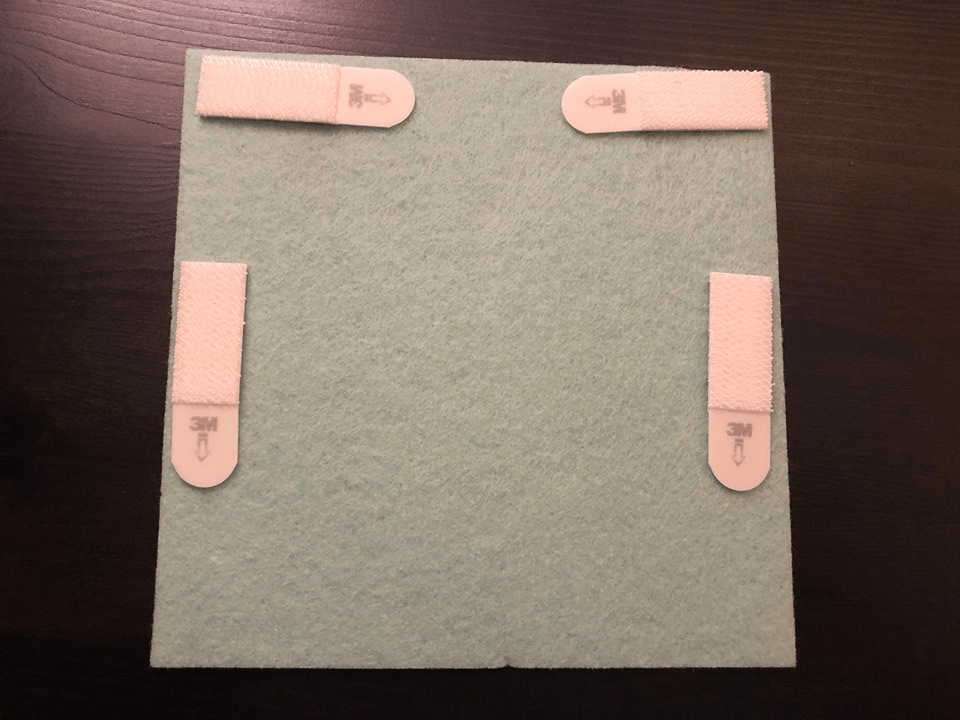
Attach Velcro strips. After the glue is completely dried (if you’re using a hot glue, it should only take a few minutes), flip over your felt classroom. Take a single Velcro strip and place it on the back of your classroom (the ideal place is along the edge of the top corner). Do this on both the top left and right corners. It might not be a bad idea to add two more along the sides.
-
Teach away! Your classroom is complete! Attach Velcro strips to the wall behind where you’ll be teaching and voila! A background! Make sure that you bring extra Velcro strips with you when you travel for easy set-up.
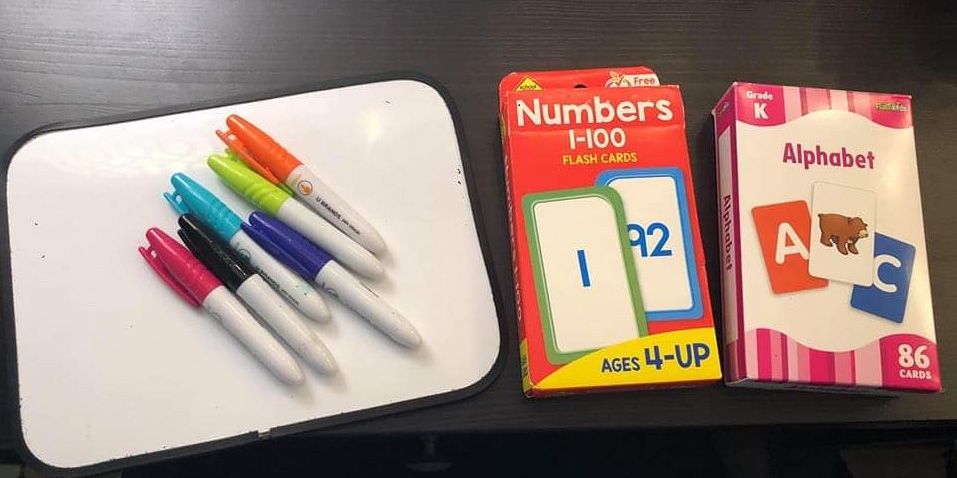
But wait! What about props?! Portable props are a must. Here’s what I use: ABC flashcards, 123 flashcards, and a mini whiteboard (mine is 6 ½” × 8”) with a few markers. For these, I used Amazon. You can find some fairly inexpensive ones (the ABC flashcards that I use cost less than $3). These items are small enough that you can fit them in your suitcase when you’re travelling. Plus, they don’t take up that much space when you’re not!